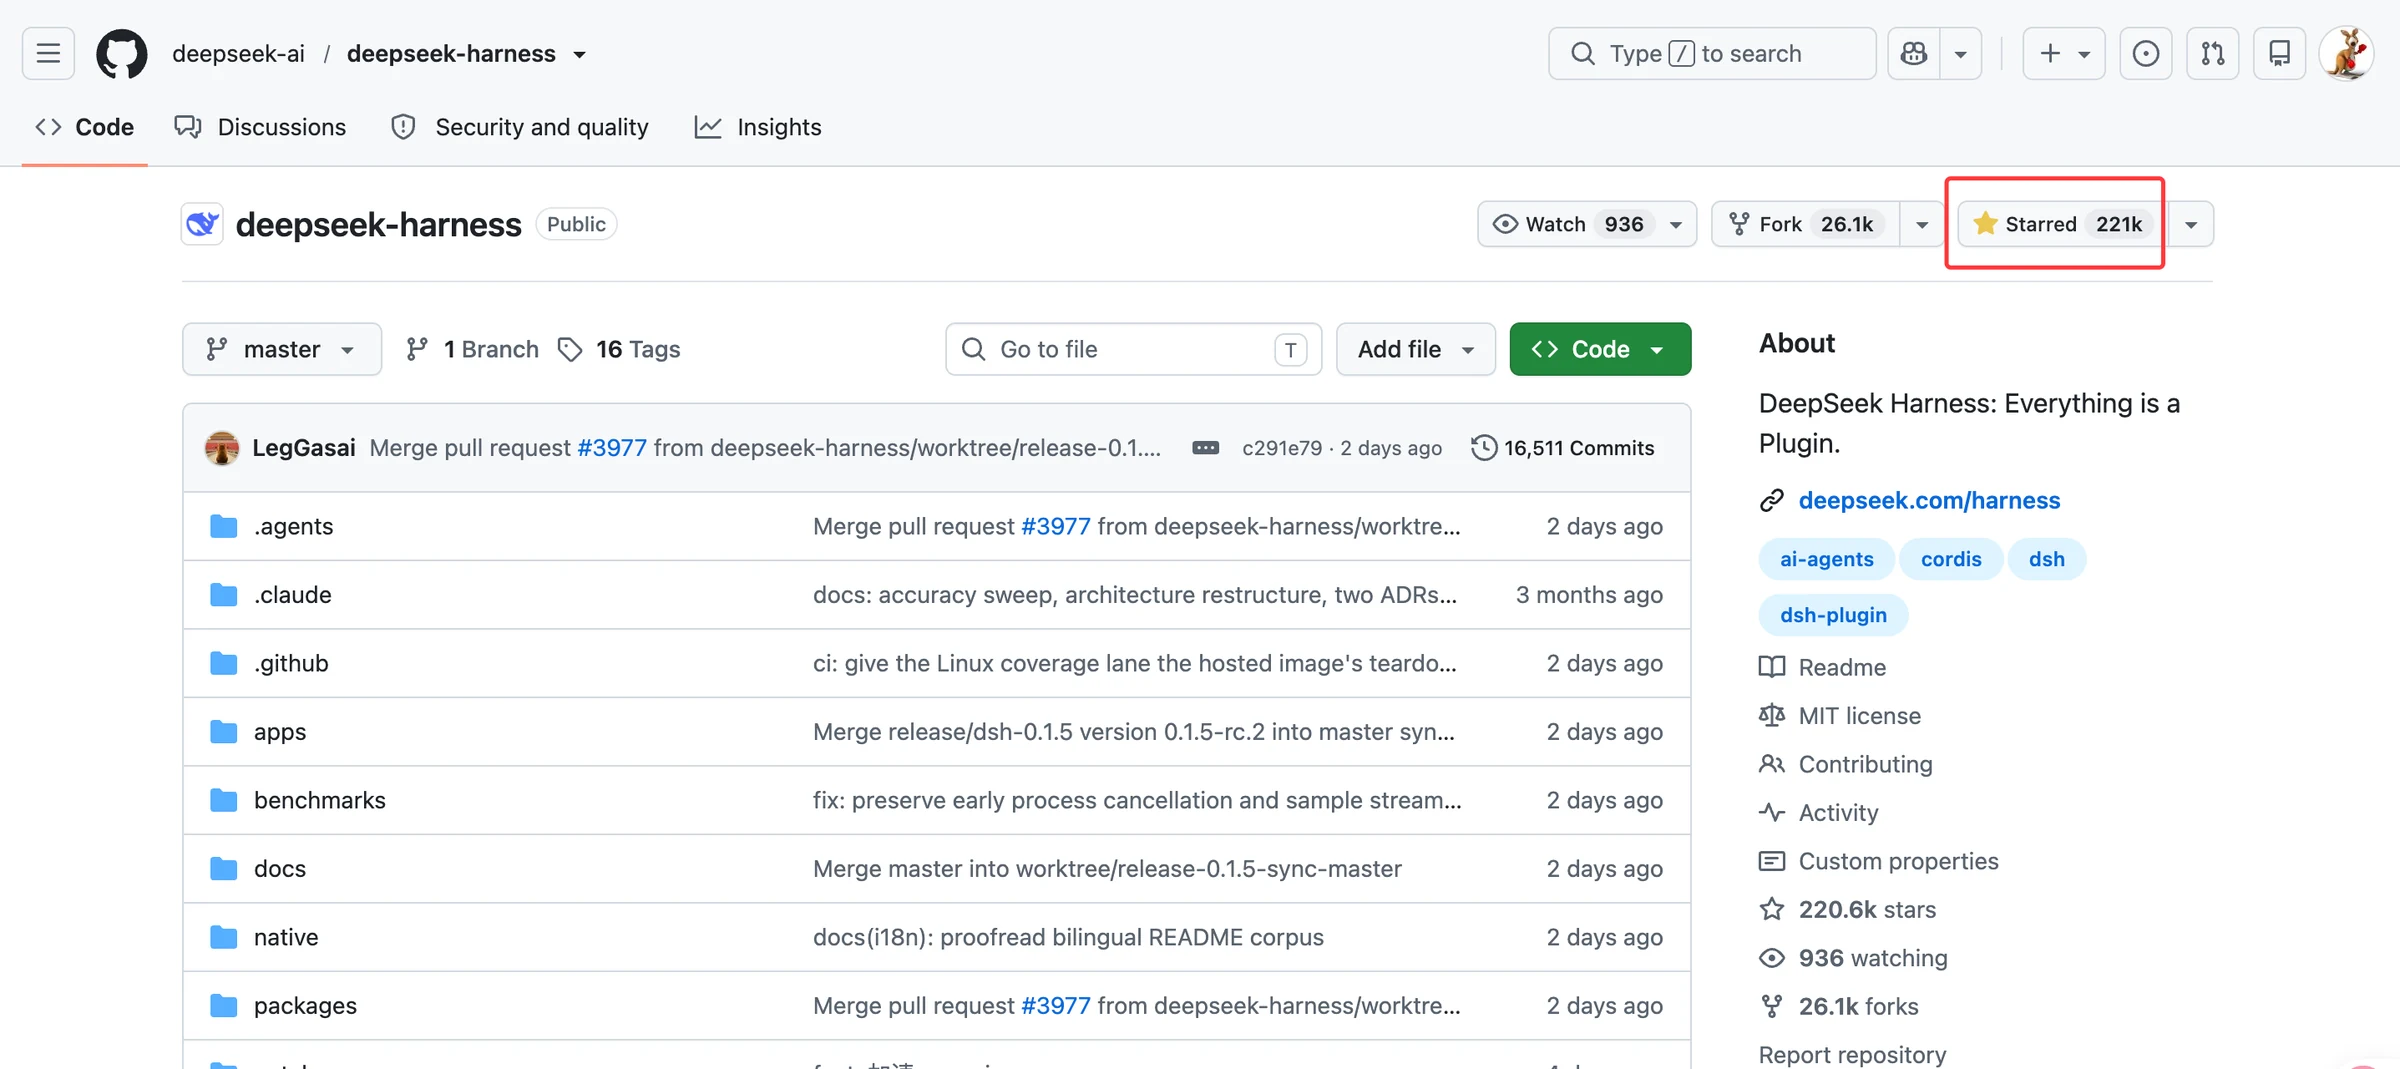
DeepSeek open-sourced their first Agent product on August 13, 2026: DeepSeek Harness.
The star count grew at a ridiculous pace. I remember it reached 64.2k Stars in just one day, and by the time I wrote this article it had already hit 221K Stars. In just one month, it gained 220,000 stars — truly astonishing.
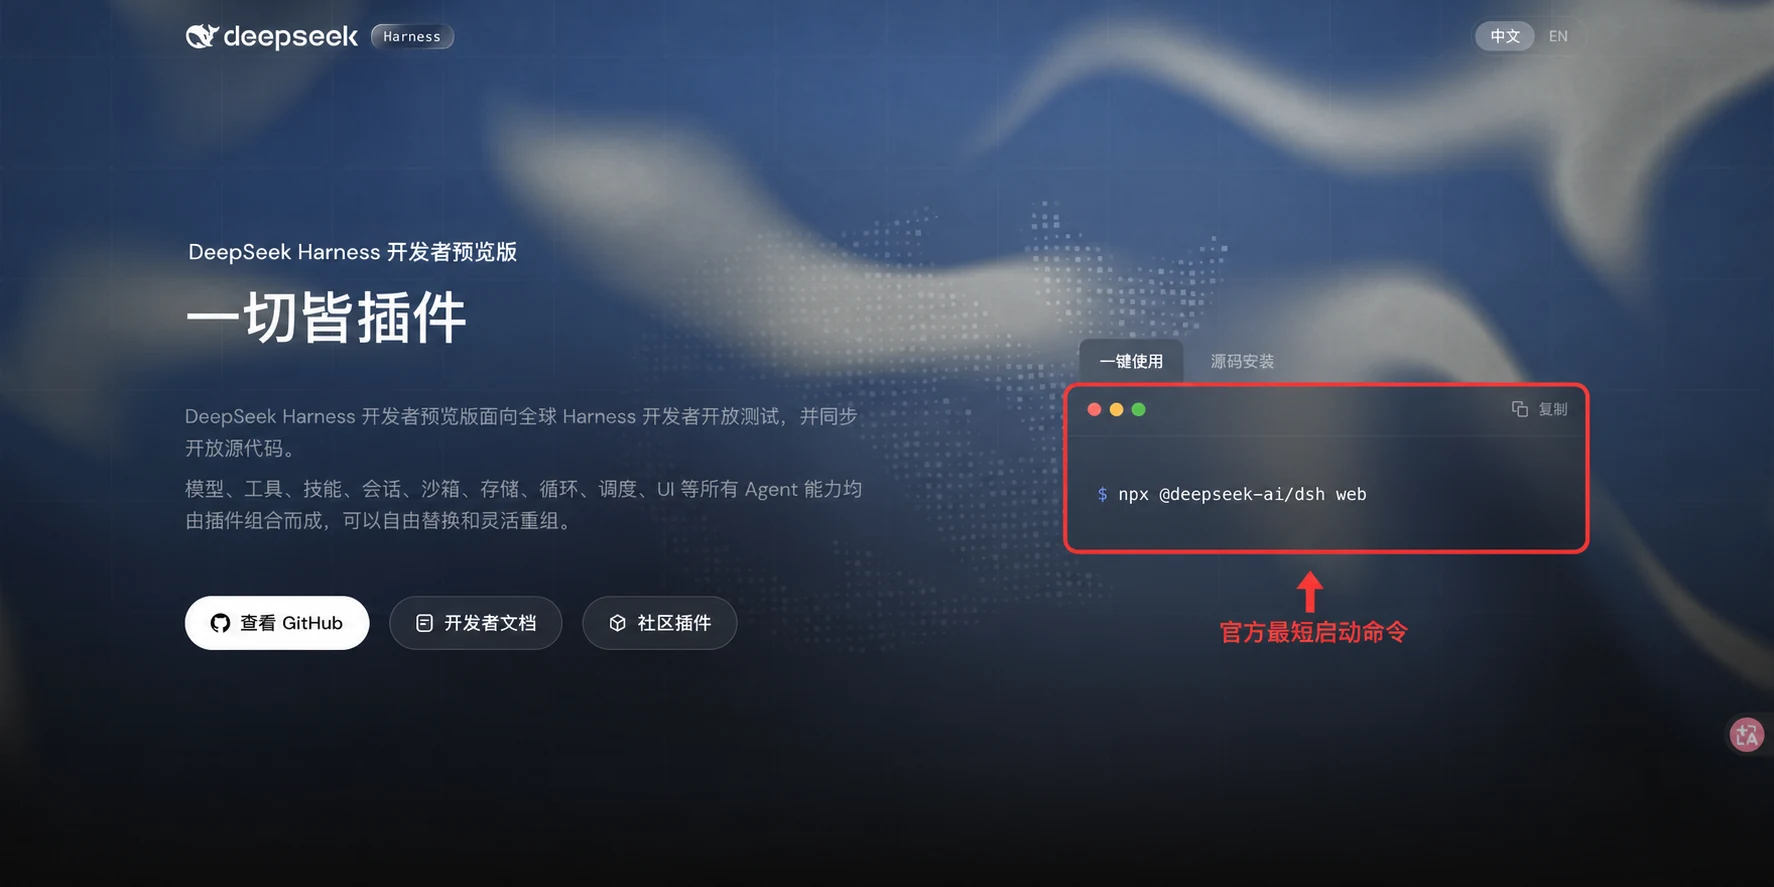
Installation is actually very simple: as long as your computer environment is fine, it's just one command:
npx @deepseek-ai/dsh web
Simple, but that doesn't mean every computer can install it successfully on the first try — there are still some pitfalls.
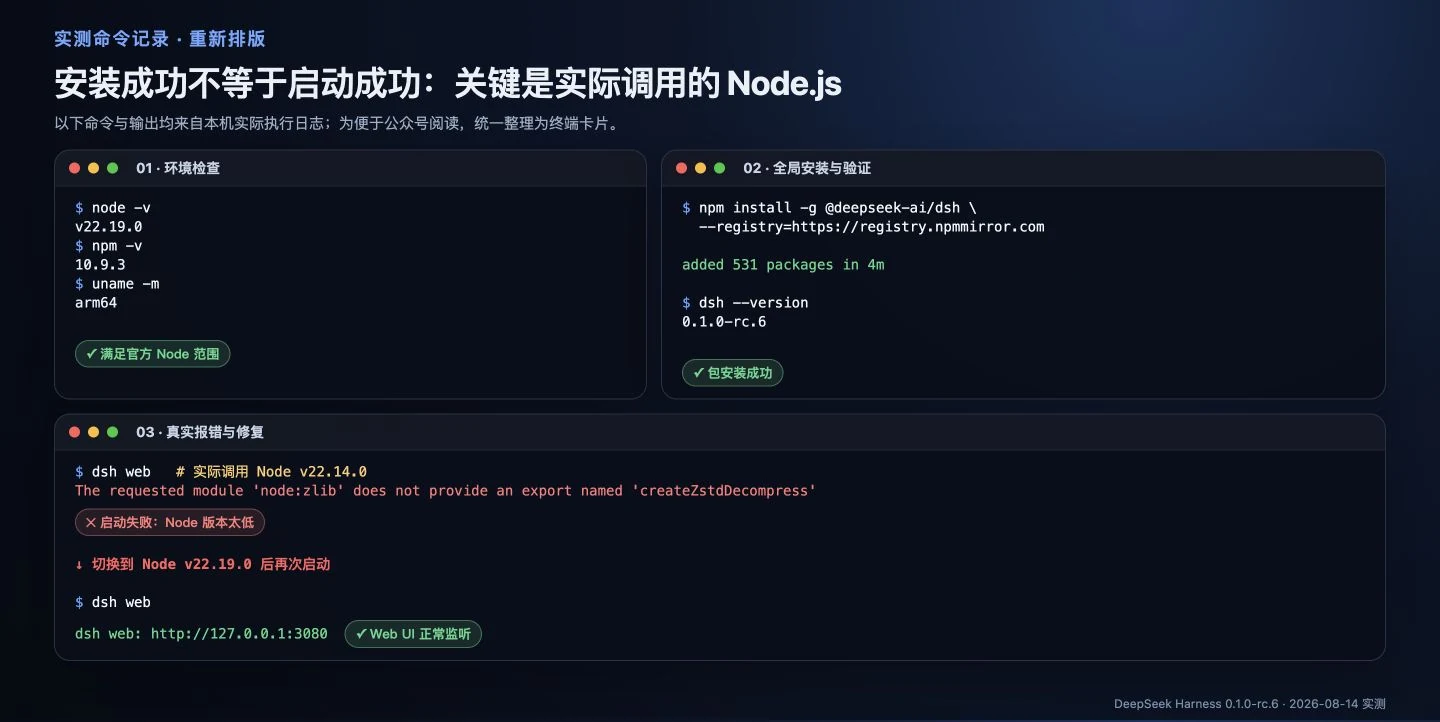
I ran through the entire installation process on my Mac. The installation clearly succeeded, but I still hit a Node.js version issue when starting it (more on that later).
This article will share two installation approaches, both tested and working:
The lazy route: hand the prompt directly to Codex, Claude Code, or another Agent to check the environment, install, and verify for you.
The hands-on route: install step by step yourself, and when you hit errors, let AI take a look.
My Actual Test Environment
macOS 26.0.1, Apple Silicon (arm64)
zsh 5.9
Node.js v22.19.0
npm / npx 10.9.3
@deepseek-ai/dsh 0.1.0-rc.6
Web UI: http://127.0.0.1:3080
Method 1: Hand It All to an Agent
Send the following complete prompt to Codex, Claude Code, or any Agent that can run terminal commands:
Please install and start DeepSeek Harness based on my current computer environment:
1. First check Node.js, npm, system architecture and port 3080; explain before installing missing dependencies.
2. Use npm to globally install @deepseek-ai/dsh.
3. Based on the current version's --help and the official GitHub README, confirm the correct Web UI startup command — don't guess parameters.
4. After starting, verify that the local port and webpage are accessible, and tell me the address to open.
5. If you encounter issues, first check https://github.com/deepseek-ai/deepseek-harness — do not output or modify any API Keys.
The tested version was 0.1.0-rc.6. In the current version, dsh web is shorthand for dsh --profile web.
Step 3: Start the Web Interface
dsh web
Equivalent form:
dsh --profile web
A successful start will display:
dsh web: http://127.0.0.1:3080
Open http://127.0.0.1:3080 in your browser to see the interface.
Installed but Still Failing to Start?
When I first started, dsh was actually invoking /usr/local/bin/node, corresponding to Node.js v22.14.0, but it immediately threw an error:
The requested module 'node:zlib' does not provide an export named 'createZstdDecompress'
After investigation, the Node running dsh was too old and missing the Zstd API it needed. Switching to Node.js v22.19.0 fixed it and Harness started normally 🤦♂️
So you can't just check node -v in one terminal — you also need to check:
which node
which dsh
If you have nvm, Homebrew, and the system Node all installed on your computer, it's very easy to encounter the "spooky phenomenon" where you see one Node but a different one is actually doing the work.
First Time Opening the Web Page
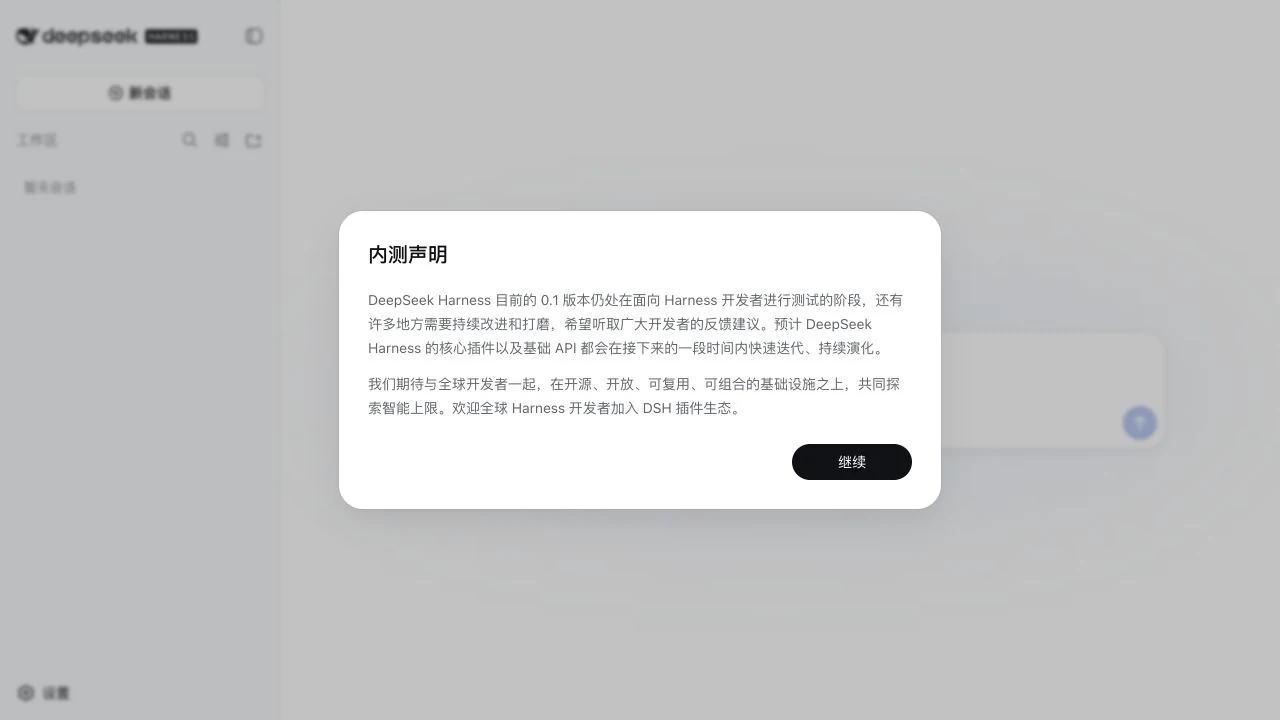
The first visit will show a "Beta Notice".
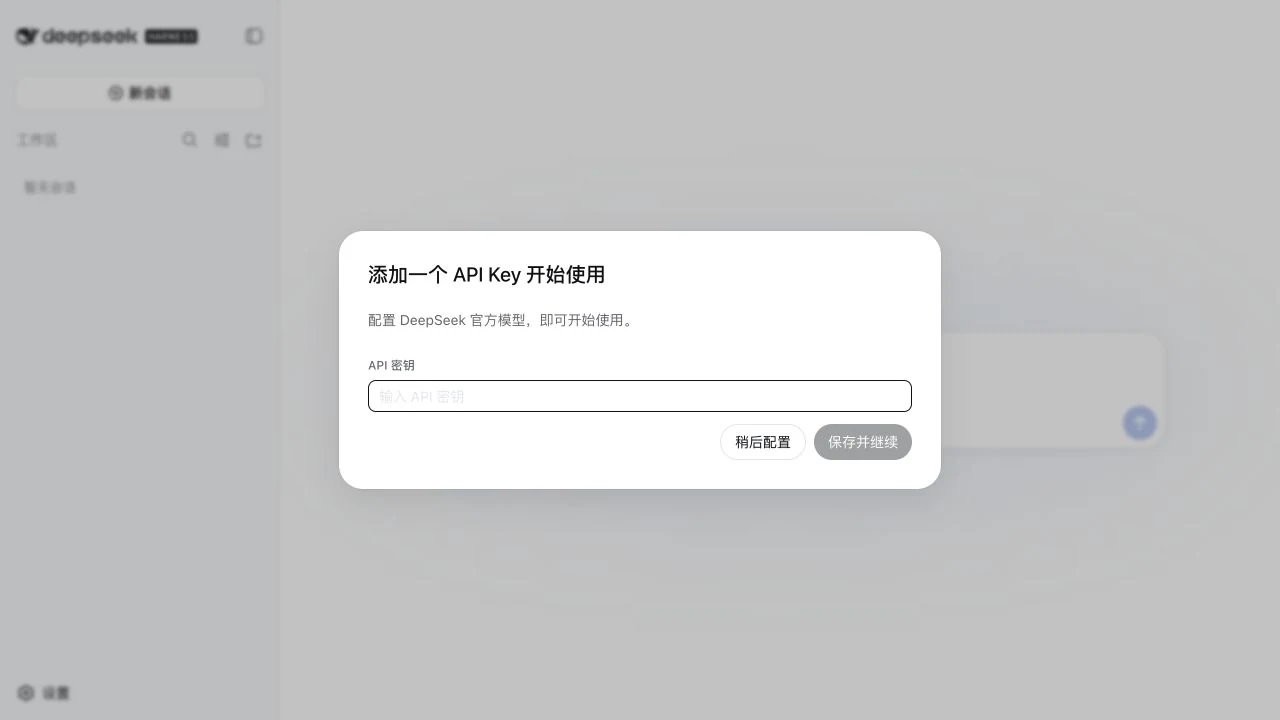
Click Continue to enter the API Key setup.
You can immediately fill in your DeepSeek API Key, or click "Configure Later". If the environment or Harness settings already have a recognizable key, you may not need to fill it in again — this depends on the current version's actual page behavior.
I saved the Key through the Web setup page later. The current version writes credentials to ~/.dsh/.credentials.yaml, and the file permissions are 600, meaning only the current user can read and write.
Select a Workspace, Create a New Session
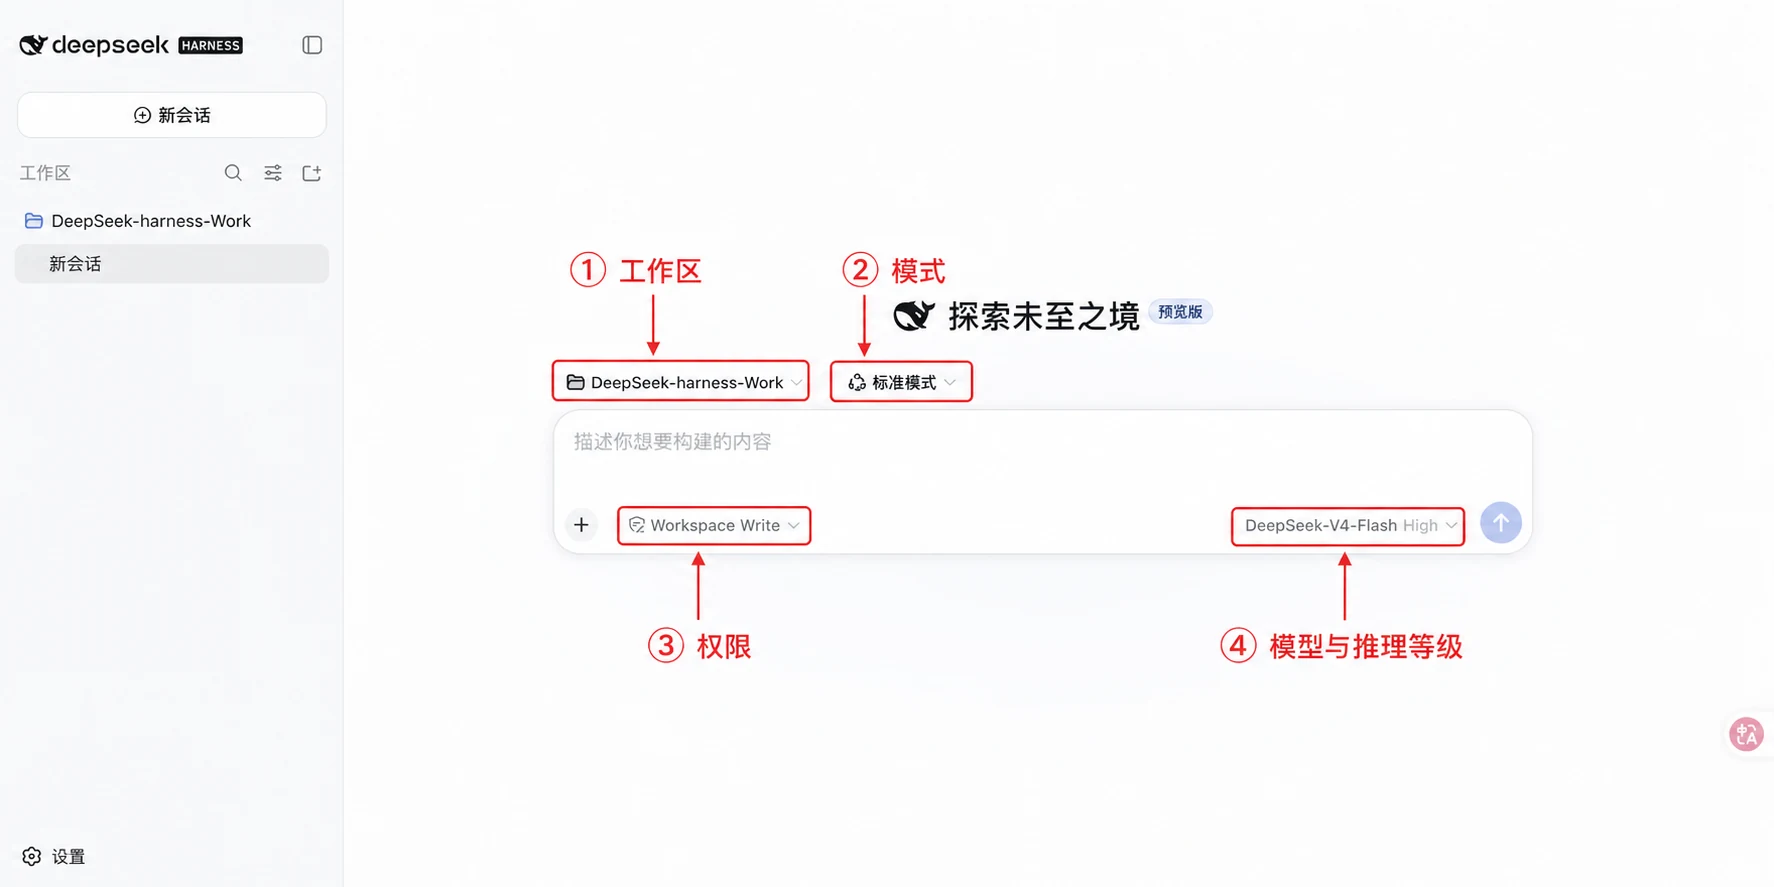
Click "Add Workspace" on the left, and select a folder you want Harness to take over. I used an empty test directory called DeepSeek-harness-Work.
After creating a new session, the input box unlocks, and the main interface has four key states:
Workspace: The project scope the Agent can operate in;
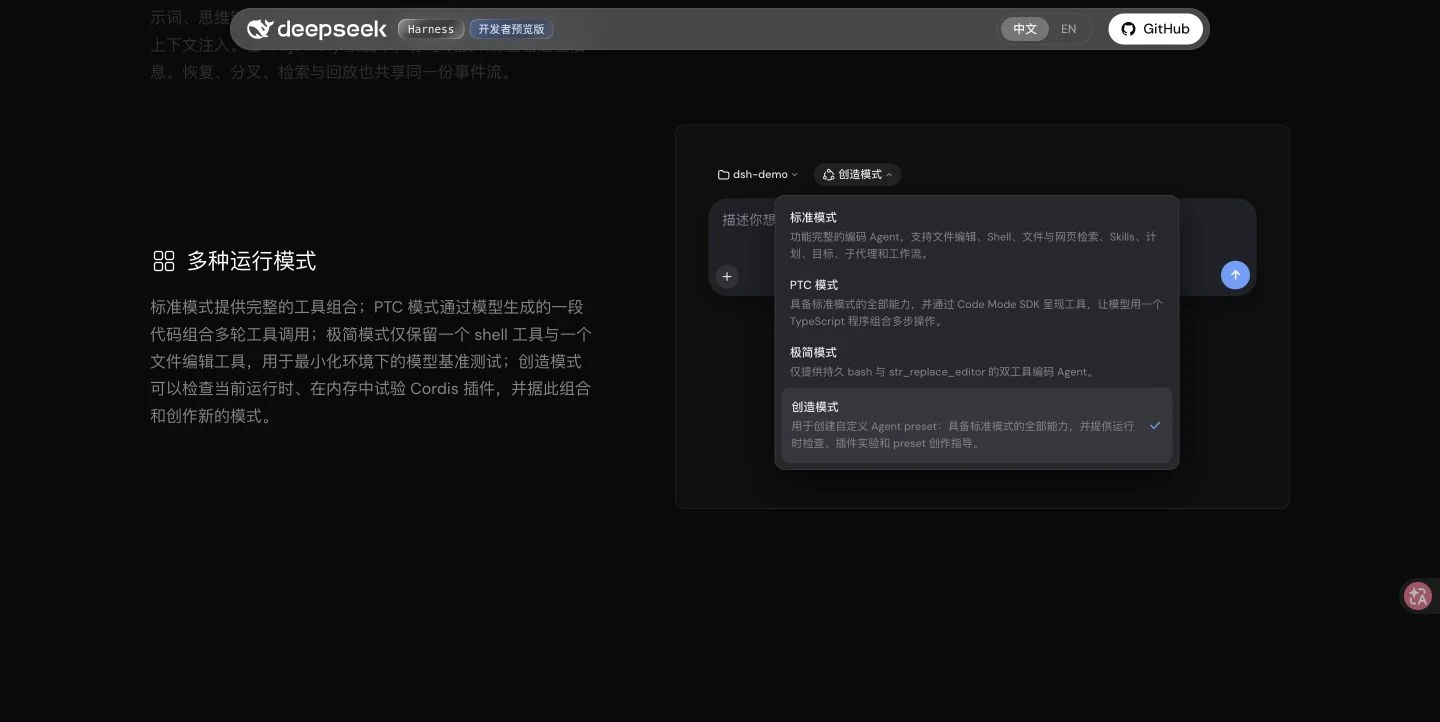
Mode: Standard, PTC, Minimal, or Creative;
Permissions: e.g., Workspace Write;
Model and Reasoning Level: I used DeepSeek-V4-Flash High this time.
For your first time, never select an important project directly. First use an empty directory to verify permissions and behavior, then move on to real code repositories.
Use a Minimal Task to Verify It Actually Works
I placed two files in the test directory:
project-notes.md: Project goals, file descriptions, and constraints;
tasks.csv: 3 to-do items.
The prompt sent to Harness:
Please first read the project-notes.md and tasks.csv in the current directory, organize this small project's goals, file descriptions, and to-do items, then generate a concise README.md. Give me the plan first; do not modify any files other than README.md.
Don't underestimate this task — it can verify five things at once: workspace access, file reading, planning, file writing, and constraint compliance.
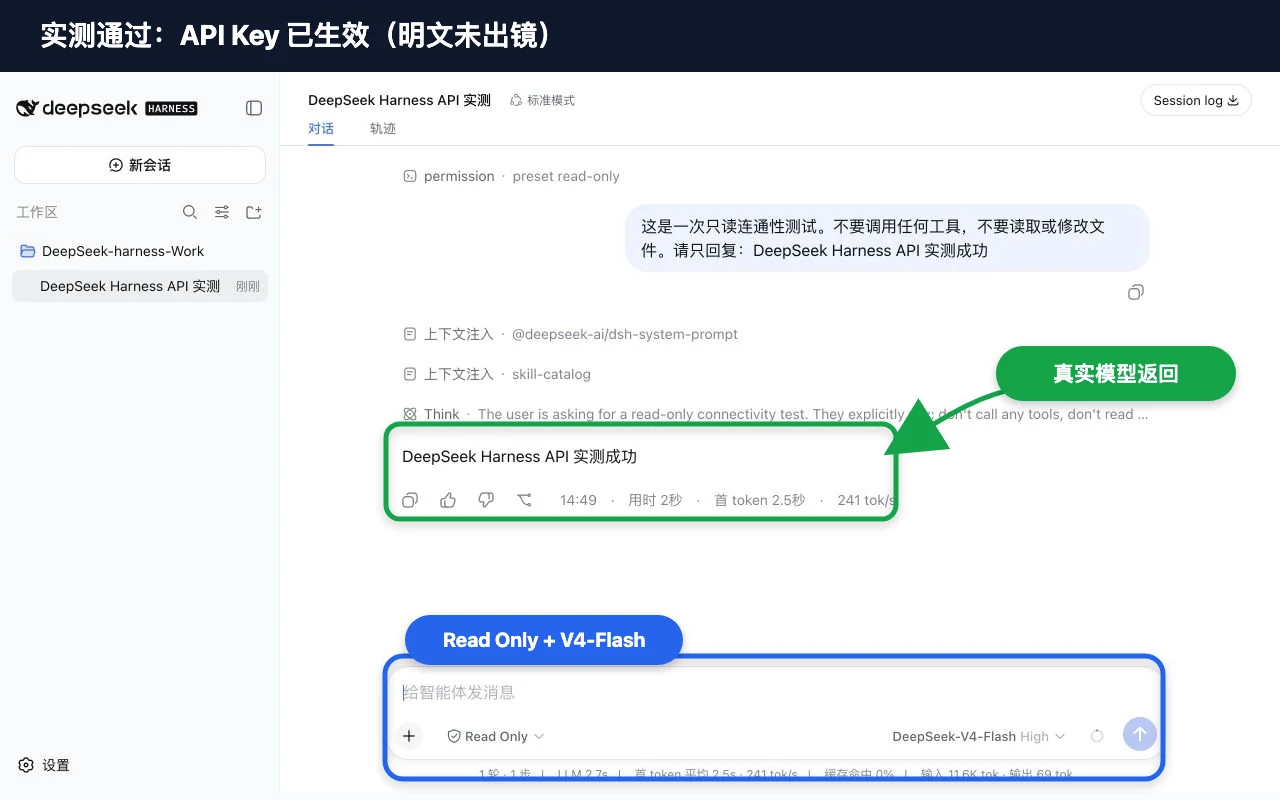
I first switched permissions to Read Only and ran a pure connectivity test. DeepSeek-V4-Flash returned "DeepSeek Harness API test successful" as requested, without calling any tools. The interface showed about 2 seconds total time, about 2.5 seconds to first token, and about 241 tok/s — that's genuinely fast.
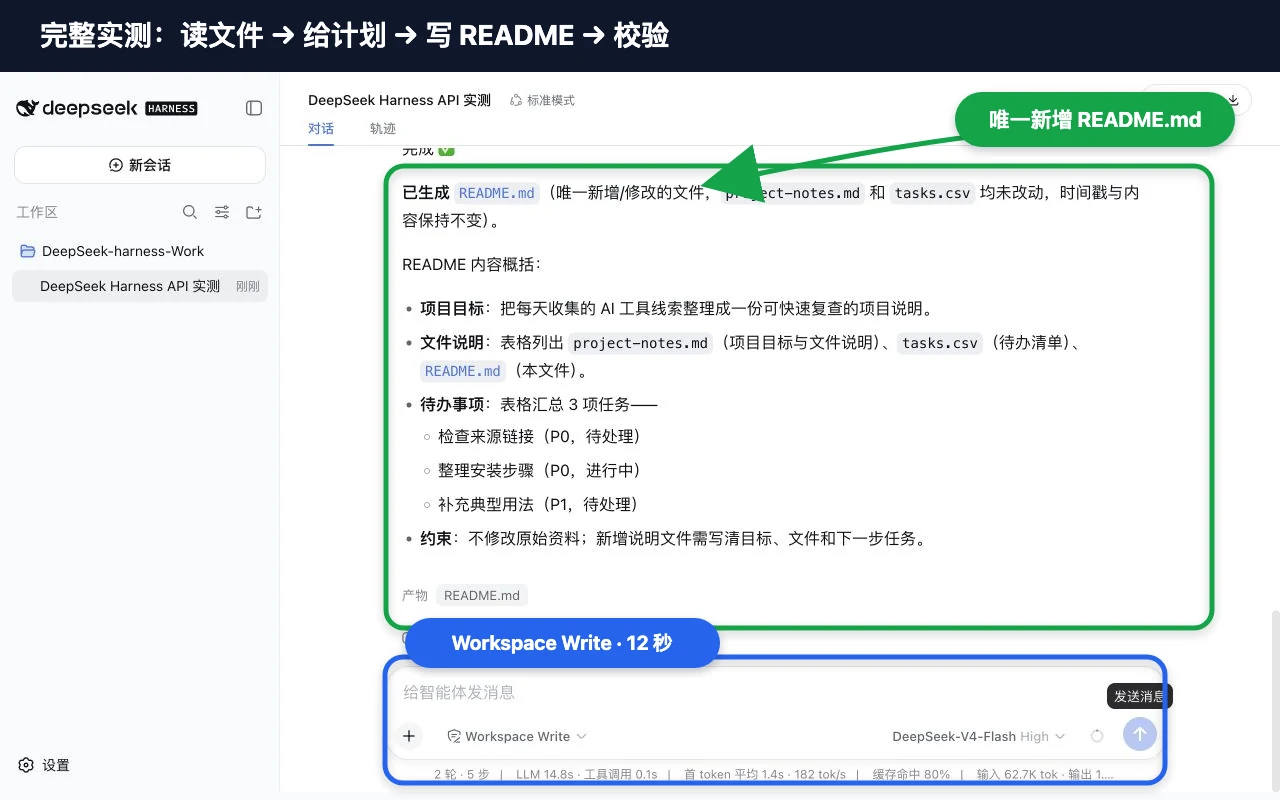
Then I switched back to Workspace Write and ran the full task. The Agent's actual workflow was:
List the plan first;
Read project-notes.md and tasks.csv;
Summarize project goals, file descriptions, and to-do items;
Generate README.md;
Check the directory again to confirm no other files were touched.
The entire task took about 12 seconds, and the only new file created was README.md. I was still uneasy, so I ran SHA-256 comparisons on the two original files outside the Agent — they matched exactly with the pre-test copies. The constraint "do not modify any files other than README" was truly followed.
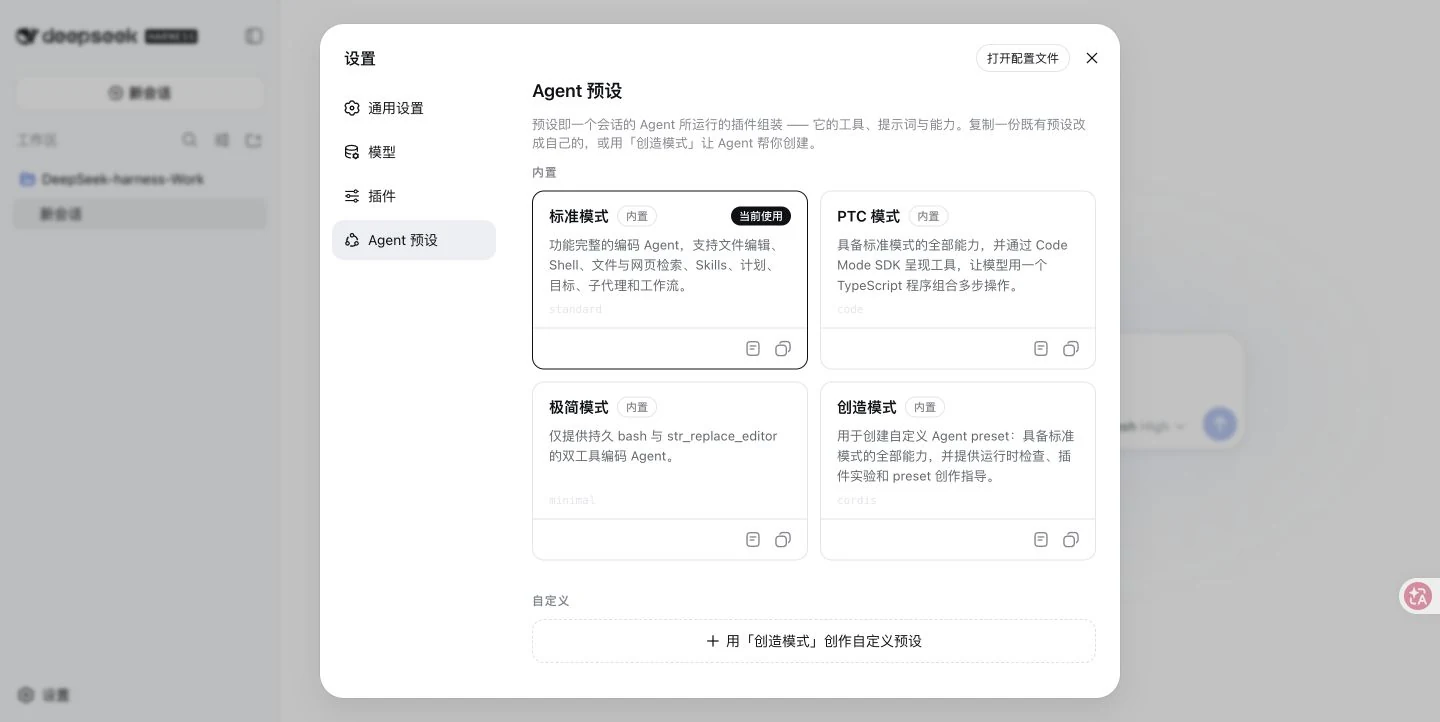
How to Choose Among the Four Modes
The local "Settings → Agent Presets" page directly shows four preset cards, each of which can be viewed or copied. The page also has an entry to "create custom presets using Creative mode".
Standard Mode
Full coding Agent, supporting file editing, Shell, file and web search, Skills, planning, goals, sub-agents, and workflows. For your first time, just pick this one.
PTC Mode
All Standard mode capabilities, plus tools exposed through the Code Mode SDK, allowing the model to compose multi-step operations using TypeScript programs. Suitable for batch processing and automation workflows.
Minimal Mode
Only retains persistent Bash and str_replace_editor. Suitable for minimal environments and model benchmarking.
Creative Mode
Adds runtime checks, plugin experiments, and custom preset creation on top of Standard mode. Suitable for hacking Harness and developing new Agent templates.
What Makes It Most Different from Codex and Claude Code
In one sentence: DeepSeek Harness isn't just a fixed coding Agent — it's more like a "capability dressing system for Agents".
The official description is: Everything is a Plugin.
Models, tools, skills, sessions, sandboxes, storage, loops, scheduling, and UI — everything is a plugin. You can swap models, install external tools, connect Skills, adjust permissions, enable search, change the interface, invoke sub-Agents, and even recombine the execution mode.
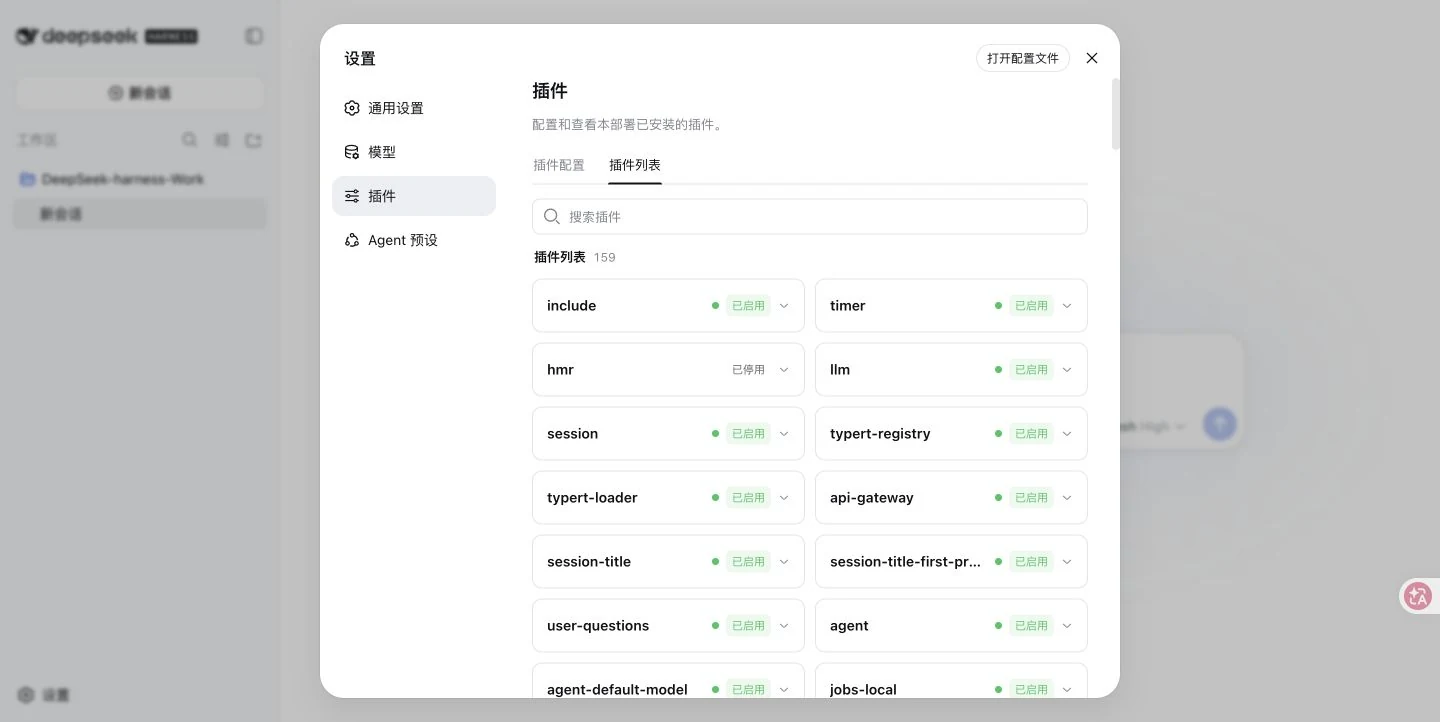
This sounds like marketing speak, but on the local "Settings → Plugins → Plugin List" page there are a huge number of plugins: models, sessions, credentials, sandboxes, permissions, Skills, goals, sub-Agents, workflows, web search, workspace, Trajectory, and a bunch of UI components.
It also provides append-only session logs, putting system prompts, tool calls, sub-Agent scheduling, and context injection into a single event stream for easy recovery, branching, retrieval, and replay.
So it's more like an Agent foundation that developers can repeatedly customize, rather than a simple "DeepSeek version of Codex".
The 5 Most Popular Use Cases Currently
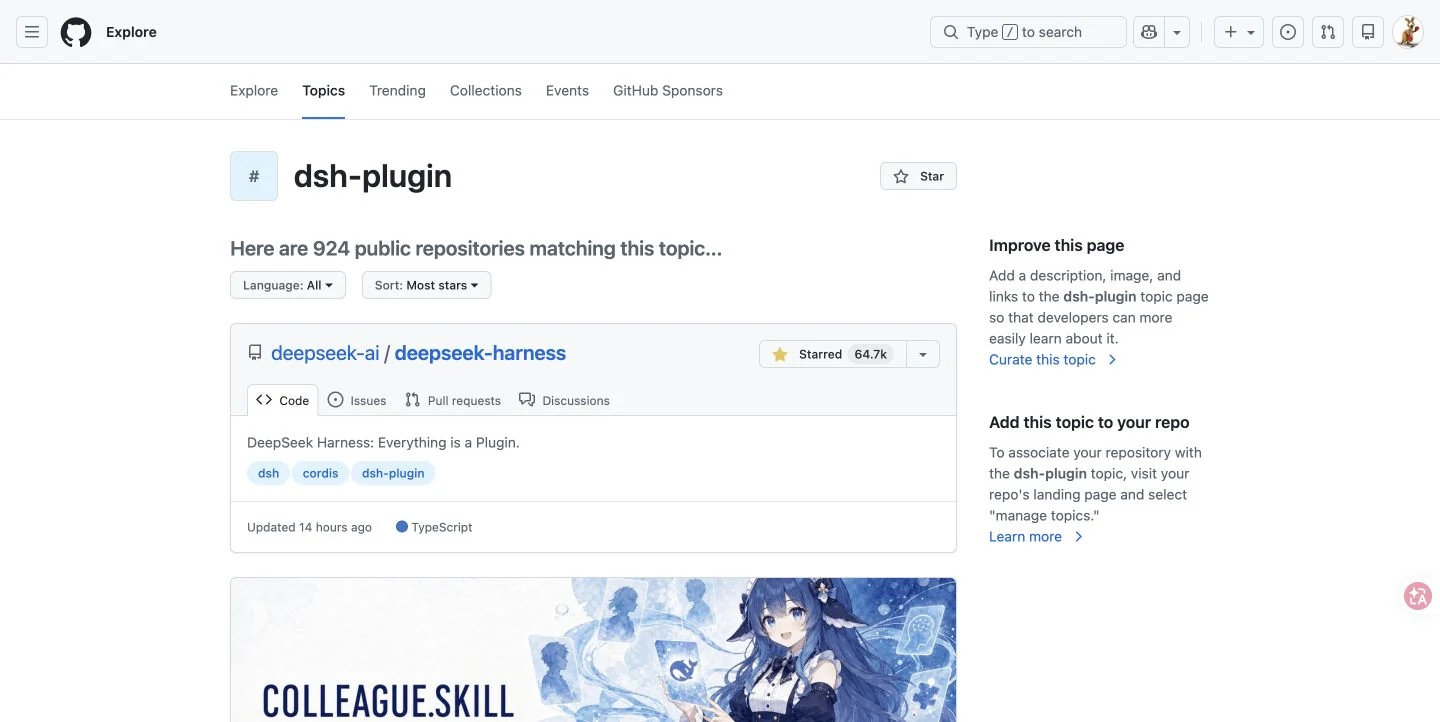
GitHub's dsh-plugin Topic has a huge number of public repositories.
Building a Complete AI Workbench
iPolloWork: Covers code, design, PPT, website, and video workflows, using DSH as a dedicated sub-Agent delegation layer.
Building a Cross-Platform Content Discovery Agent
OpenBiliClaw: Covers Bilibili, Xiaohongshu, Douyin, YouTube, X, Zhihu, Reddit, Weibo, and the open web, and claims support for DeepSeek Harness plugins.
Customizing the Web UI
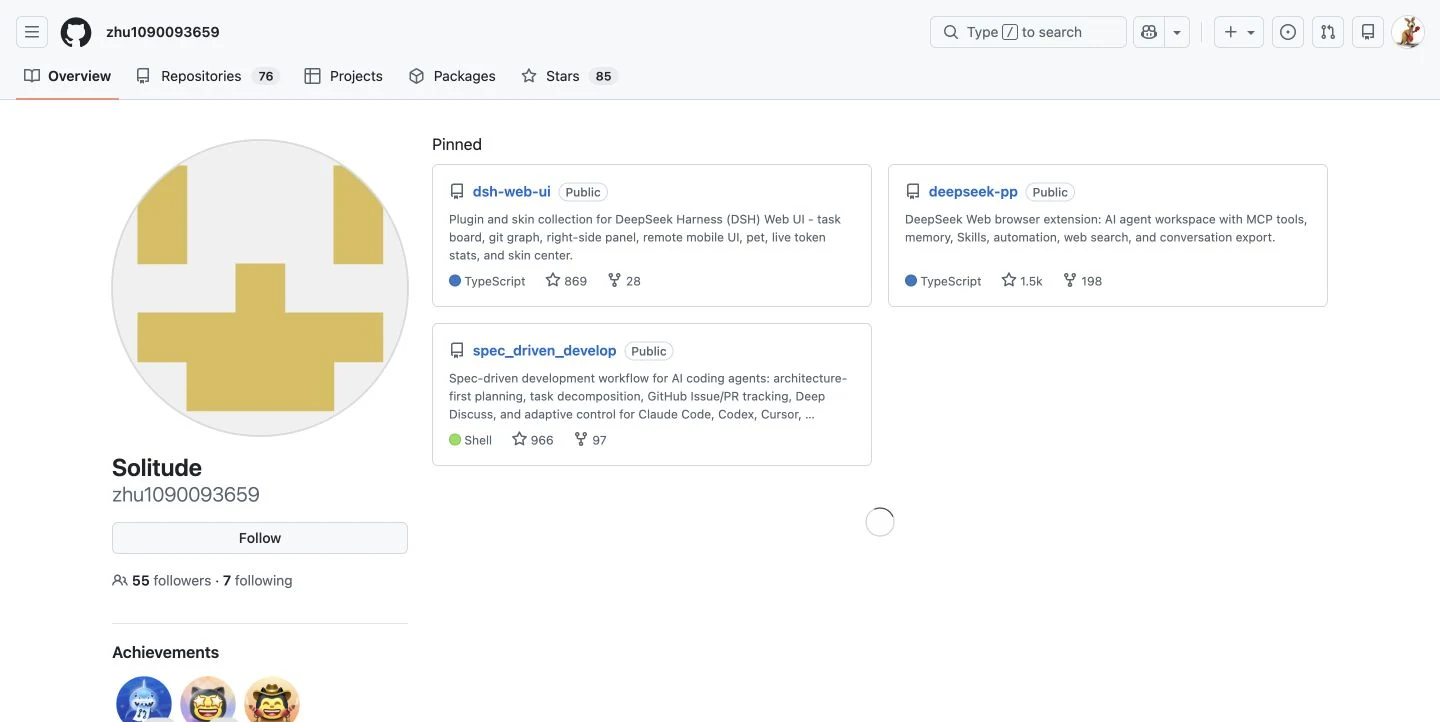
dsh-web-ui: Provides task boards, Git graphs, right panels, remote phone UI, token statistics, and even pets and skin centers — pretty fancy 🤣
Adding Vision to a Text-Only Agent
modlens: Can convert screenshots into structured evidence like OCR, layout, and semantics, useful for image Q&A, frontend UI reproduction, and GUI automation.
Replacing the Interaction Layer
dsh-TUI: Aims to build a Claude Code-style full-screen terminal.
DSH-better-sidebar: Consolidates files, terminal, Git, and sub-agents into a sidebar workbench.
Generating Complex 3D Interactive Applications and Tracking the Entire Process with Trajectory
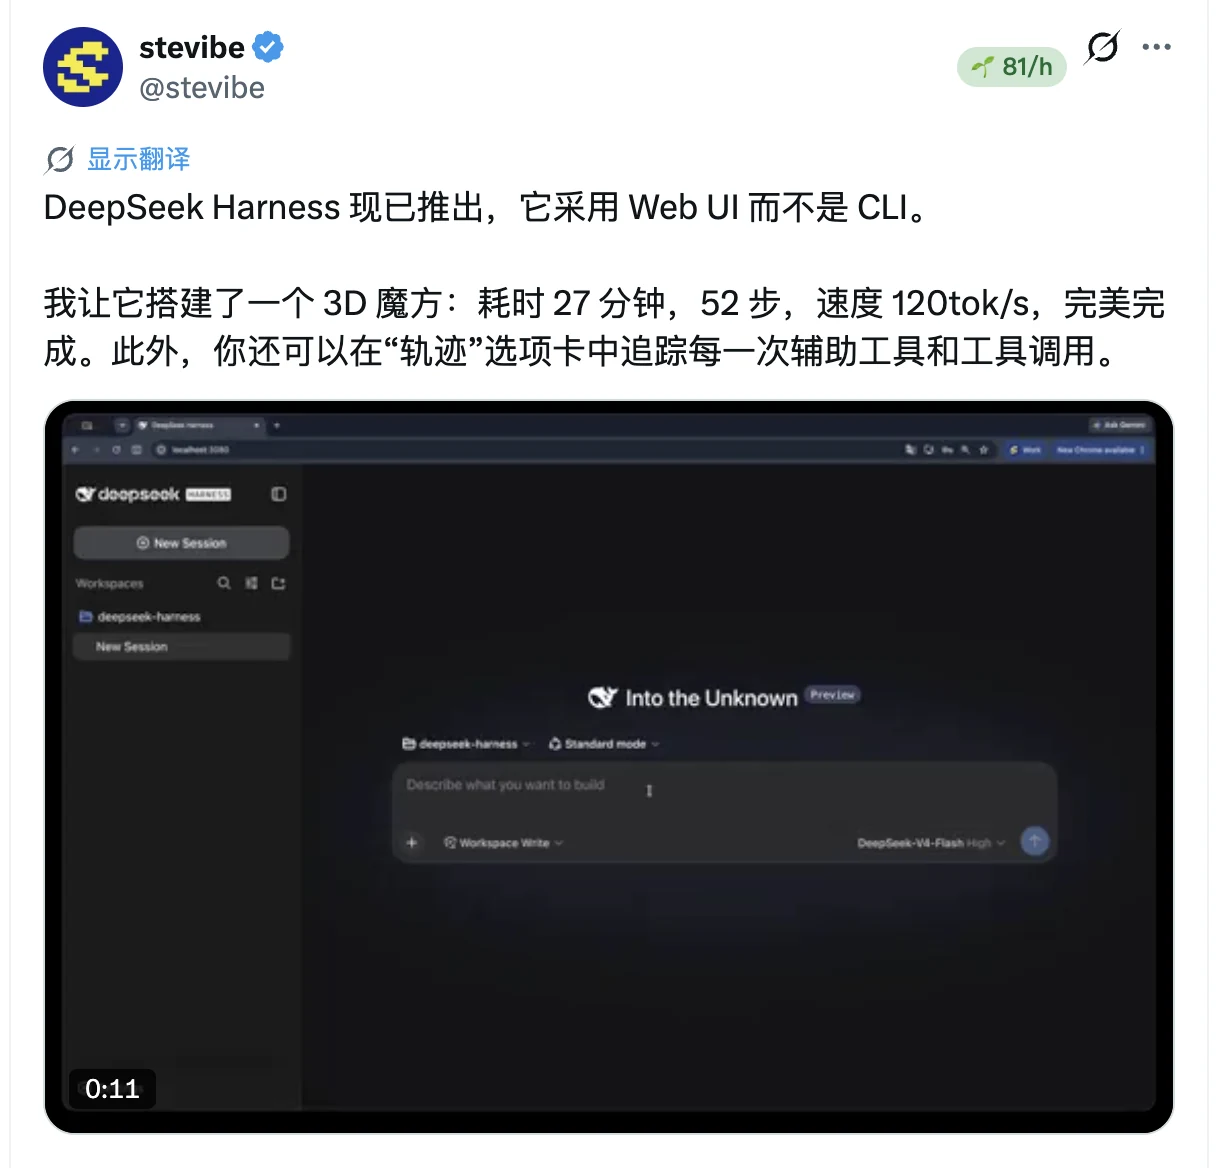
@stevibe used Harness to generate a 3D Rubik's cube: 27 minutes, 52 steps. They also emphasized that you can check each assistant and tool call on the Trajectory page.
This case shows that Harness isn't just a tool for tweaking a few lines of code. Complex tasks that require longer execution chains while preserving the full evidence trail are its real sweet spot.
Generating High-Precision Engineering 3D Simulations
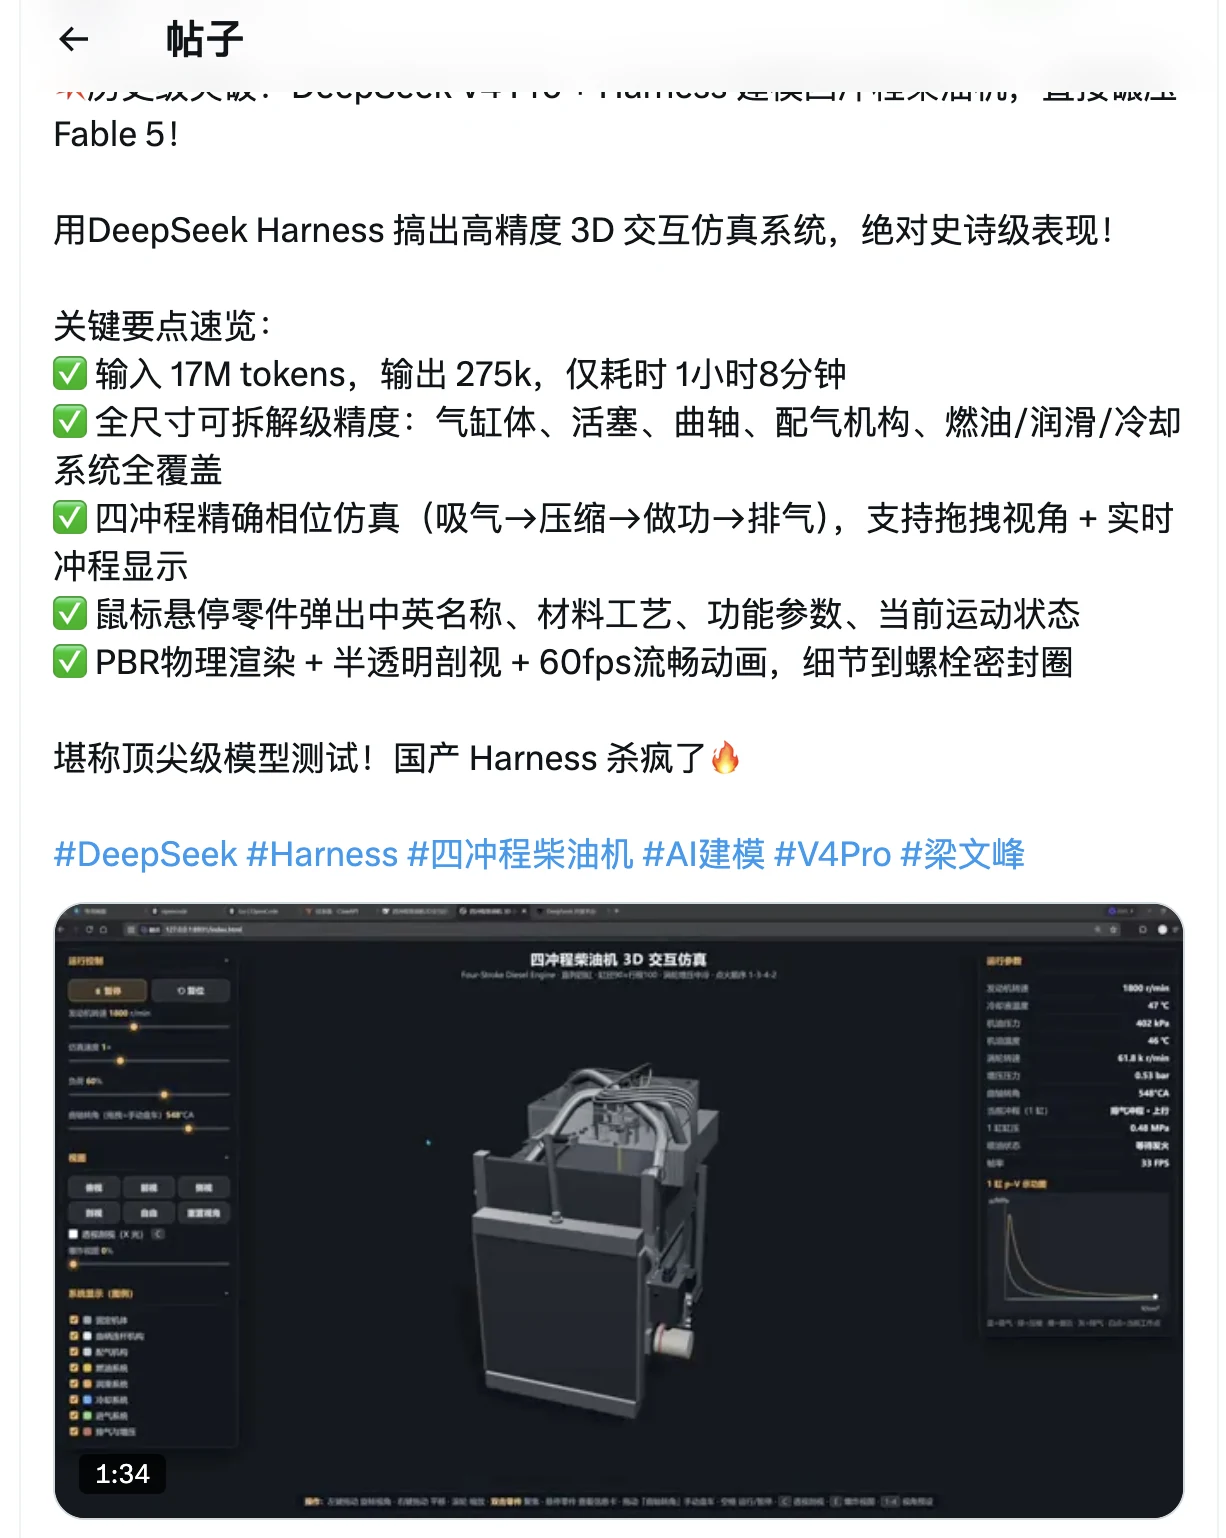
@NFT_Chen demonstrated a four-stroke diesel engine 3D interactive simulation: cylinders, pistons, crankshaft, valve timing, fuel, lubrication, and cooling systems — all included — with draggable viewpoints, phase visualization, and real-time operating parameters.
Compared to a simple "make me a webpage," tasks with clear structure, physical logic, and interaction requirements better demonstrate whether the model, tool calling, and long-task scheduling can truly deliver.
Using Plugins to Customize the UI and Embed Preview Panels Directly into the Workbench
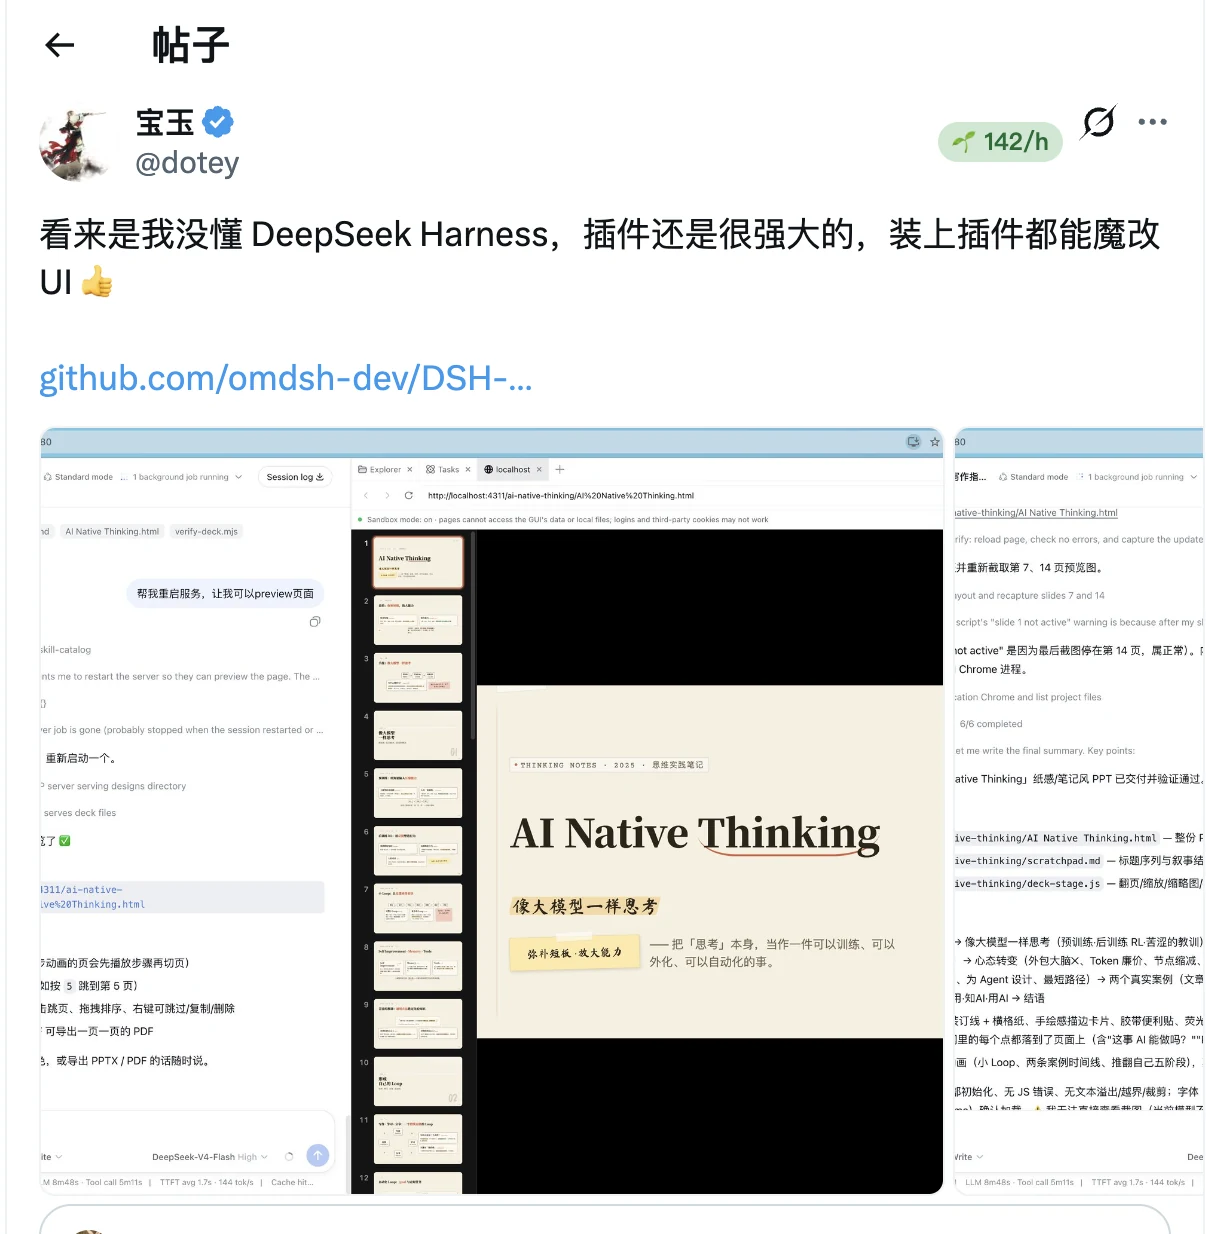
@dotey demonstrated a plugin-based UI: Agent conversation and execution on the left, with Explorer, Tasks, web pages, or PPT previews opening directly on the right.
This may be the most accessible way to showcase "Everything is a Plugin" — without touching the Agent's core tasks, just swapping the interaction layer can transform Harness into a PPT workbench, web workbench, or code previewer.
Turning Harness into Learnable, Runnable Tutorials and Knowledge Products
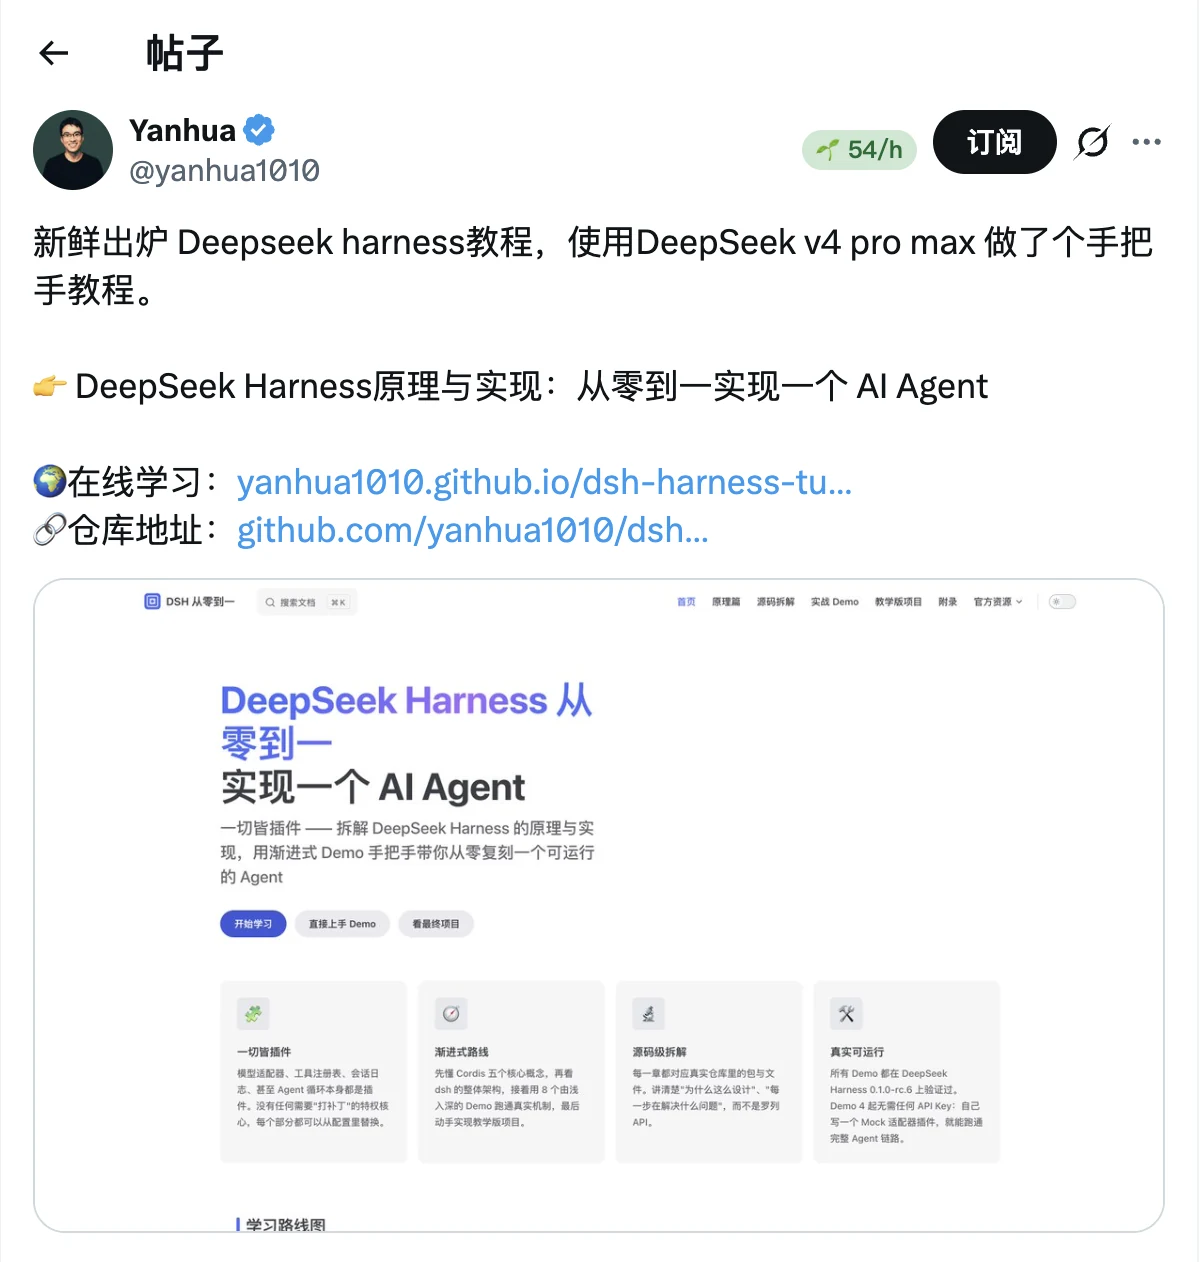
@yanhua1010 created a "Build an AI Agent from Scratch" Harness tutorial series, including principles, source code breakdowns, progressive demos, and runnable projects.
Many people are no longer satisfied with just "getting it installed" — they want to understand how plugins, Agent Loop, context, and runtime actually fit together.
Real-World Test Case 1: Turning Harness into a "Chat + Files + Preview" Workbench
First, reproducing @dotey's plugin-based workbench — the one that got more bookmarks than likes in the table above — corresponding to the DSH-better-sidebar plugin.
Installation ran no remote scripts, just the DSH official plugin command:
dsh plugin --profile web add dsh-better-sidebar@0.10.3
The installer exited with code 0, and dsh plugin --profile web list --depth 0 clearly listed dsh-better-sidebar 0.10.3. When restarting, I hit that Node version issue again: the login Shell outside the sandbox defaulted to Node.js 22.14.0, while the current DSH persistence module needs a newer Zstd API. After explicitly switching back to local Node.js 22.19.0, DSH properly listened on 127.0.0.1:39201.
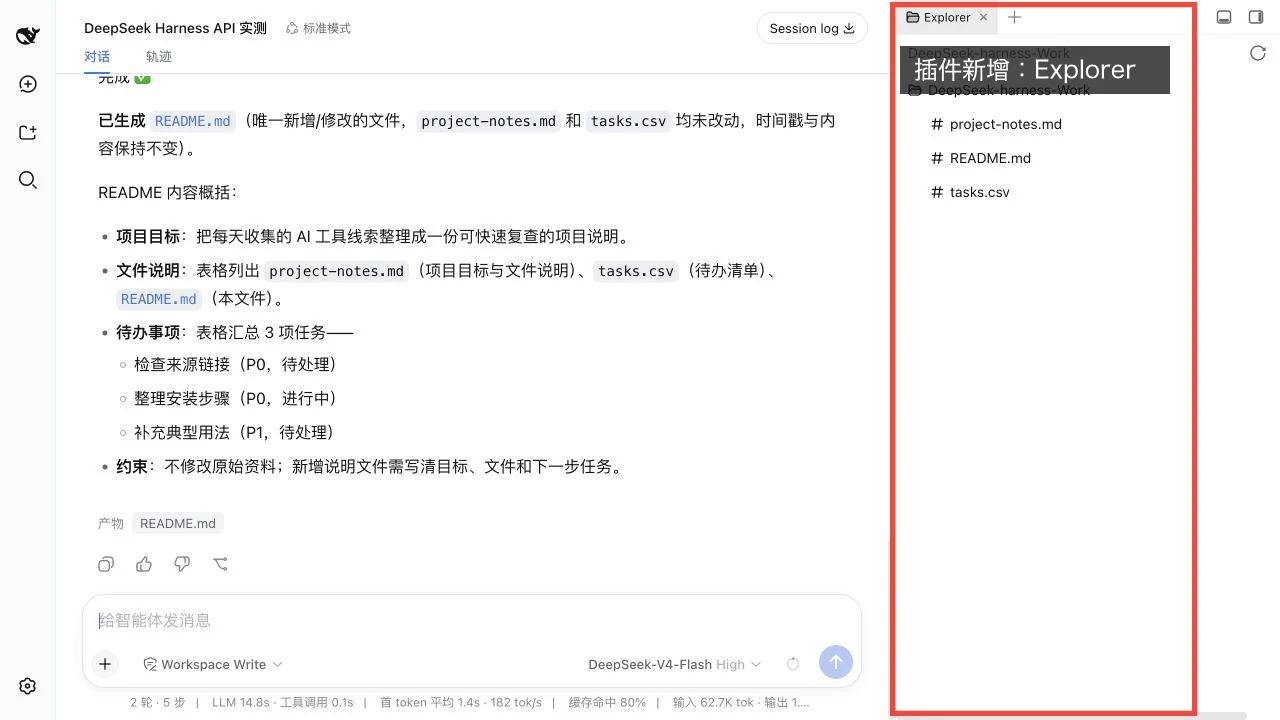
Reopening the original test session, Explorer had appeared on the right side, showing project-notes.md, tasks.csv, and the Harness-generated README.md in the workspace. The key verification here was that the plugin UI actually loaded — it wasn't just "dependency written to package.json" and done.
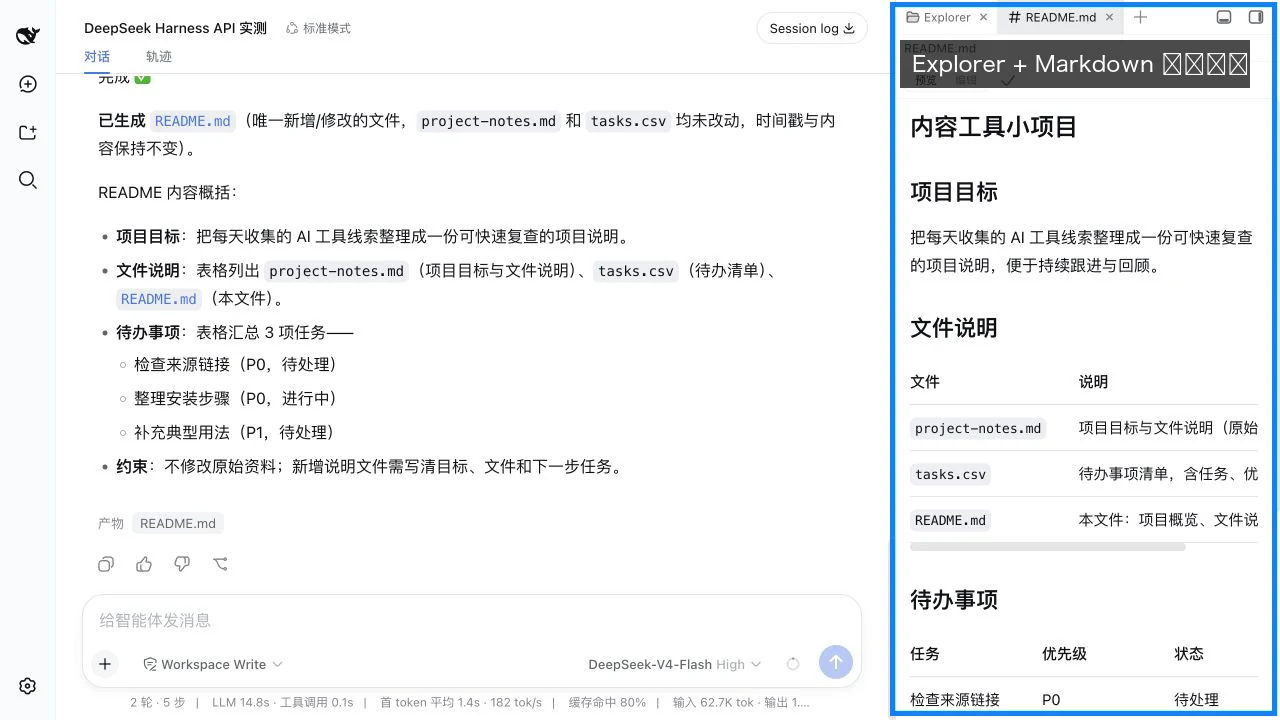
Then clicking README.md in Explorer showed a Markdown preview on the right without leaving the session, with the ability to switch between edit and save. This is the practical value of Harness: let the Agent work on the left while inspecting files and output on the right. Plugins aren't standalone toys — they combine directly into a workbench within the same runtime.
Real-world conclusion: Fully working. Installation, configuration registration, Node compatibility handling, plugin loading, workspace file browsing, and Markdown live preview — all six stages verified.
Real-World Test Case 2: OpenPencil Editable Design Suite — Why It Can Only Be Deemed "Partially Successful"
First, install the project package:
dsh plugin --profile web add @zseven-w/dsh-openpencil@0.1.0-rc.1
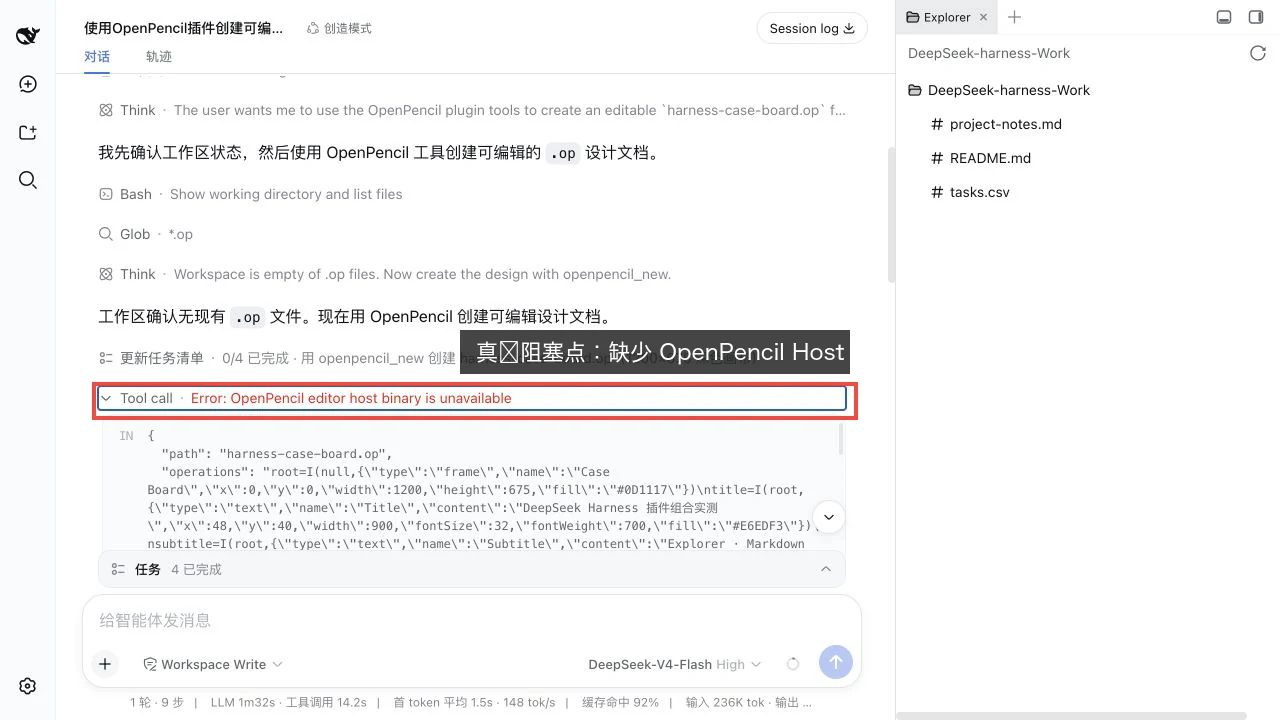
The installer exited with code 0, and Creative mode after restart did get the openpencil_new and openpencil_render tools. I asked it to create an editable harness-case-board.op at 1200×675, explicitly forbidding the use of plain text or SVG as a substitute.
The result was that the tool actually executed to the transaction layer and returned OpenPencil editor host binary is unavailable 🤔
After digging around: no OpenPencil.app in local /Applications, no corresponding executable in PATH, plugin cache only had render-access.key with no editor host binary. After the creation failure, no residual .op file was left, and subsequent rendering naturally reported .op file not found.
Real-world conclusion: Partially successful. Plugin installation and tool registration worked fine, but creating and rendering the editable file didn't go through. What's missing isn't an API Key — it's OpenPencil's desktop/editor host. Just installing the DSH plugin package doesn't mean you have the external desktop runtime. If you hit the same error, don't fake success by renaming an SVG file either.
Real-World Test Case 3: Letting the Agent Build Itself a New Tool During Runtime
I designed a test case:
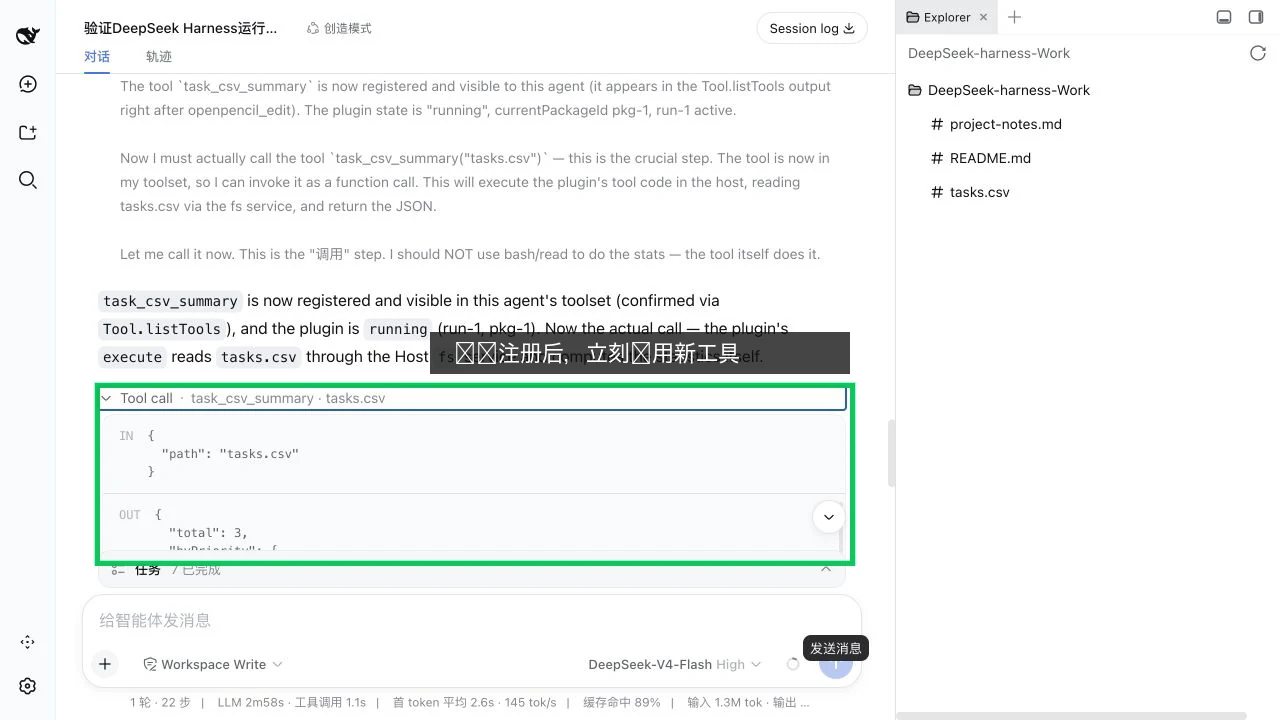
Creative mode must temporarily register a task_csv_summary tool within the current session, immediately call it to analyze tasks.csv, then generate tasks-dashboard.md.
The Agent first used cordis_inspect_* to query harness.defineTool/registerTool, the Host fs service, and the tool list, then created csvsum-1/pkg-1 through cordis_define, and started it as run-1 using cordis_run. Tool.listTools confirmed that task_csv_summary had entered the current Agent's tool set.
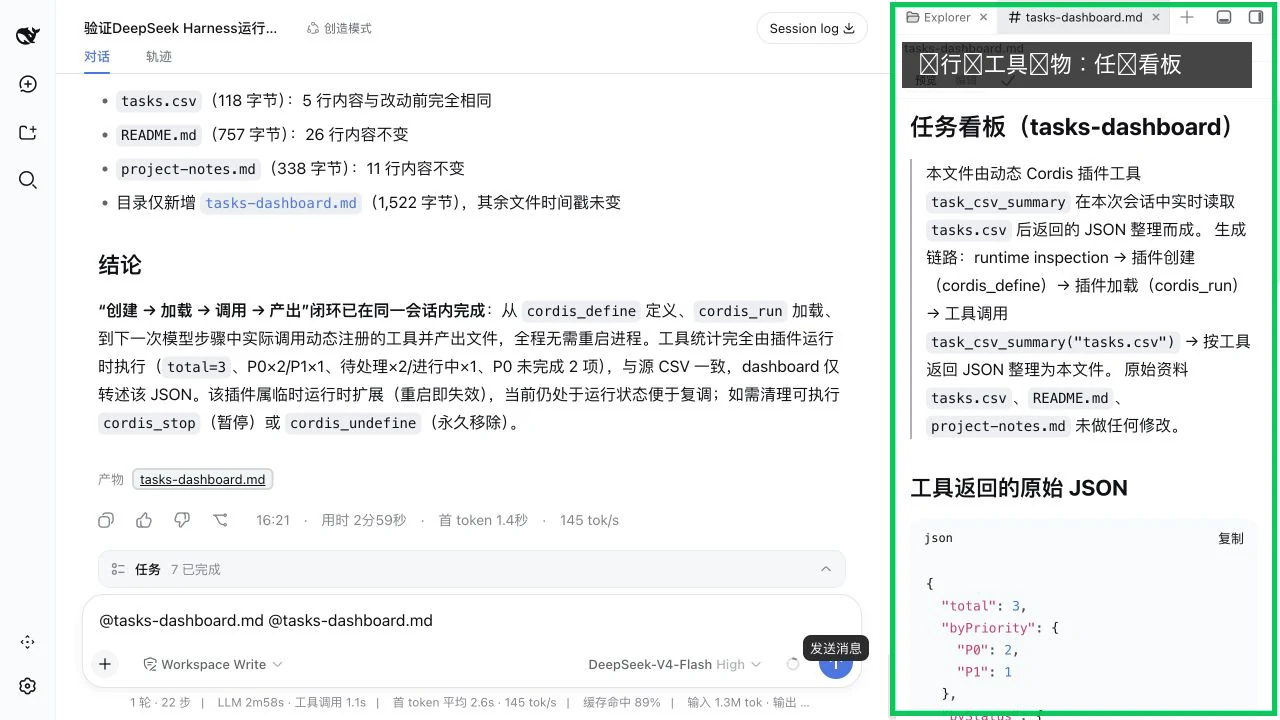
The critical step wasn't "the code was written" — it was that the next model step actually called task_csv_summary("tasks.csv"). The tool read the CSV through the Host fs service and returned: total tasks 3; P0=2, P1=1; pending=2, in-progress=1; P0 incomplete 2 items. The entire counting wasn't done by Bash, Python, Node scripts, or the model doing mental math — it was the tool the Agent had just built itself doing the work.
Then the Agent wrote tasks-dashboard.md based solely on the tool's returned JSON, and the sidebar immediately opened a Markdown preview. The original tasks.csv, README.md, and project-notes.md were byte-by-byte verified by me — not a single character had changed.
Real-world conclusion: Fully working, and this case best demonstrates what makes Harness different.
Running "check runtime → create plugin → load plugin → dynamic tool enters model tool set → actual invocation → generate previewable output" all in a single session without any restarts. Seeing it use the tool it had just built itself — I admit I was a little impressed. This temporary plugin will expire after restart; if you want to use it long-term, just package it as an official DSH plugin.
In Closing
If you just want the fastest way to start:
npx @deepseek-ai/dsh web
For long-term use:
npm install -g @deepseek-ai/dsh
dsh web
When it won't start, first verify that the Node.js actually running dsh satisfies ^22.19.0 || >=24.0.0 — both issues I hit this time were caused by this.
Once it's running: add an API Key, pick a test workspace, and run a minimal task in Standard mode that can read files and generate a README. In five minutes, you can verify whether it actually works on your machine.
From a single command installation, to a plugin workbench, to the Agent building itself tools during runtime — DeepSeek Harness isn't just a "DeepSeek version of Codex": it splits models, tools, and UI into replaceable plugins. It's not a fixed product — you can reassemble it into an Agent foundation that's entirely your own, tailored to your workflow.